All the information below is an account of a particular adventure
in mycology. None of it is recommended as the ideal, only a
fictional account of how things can go. For example, peroxide is
used in the grains even though it probably wasn’t required. It was
simply to hedge the bets on the grain-to-grain transfers. As should
be noted, the experimenter in this case was rather experienced,
although an intermediate beginner with a head on his/her shoulders
shouldn’t have much trouble with similar things.
A long long
time ago, in a galaxy far far away, a tenacious mycophile tried to
push the envelope of massive simplicity in bulk fruiting
environments. At a point before our pictorial feast, we begin with a
spore syringe of Psilocybe cubensis, Hawaiian strain. The syringe is
used to inoculate birdseed. The birdseed spawns synthetic compost.
The most charismatic fruit body is selected to continue its
existence through the marvel of cloning. The rest of her life is the
subject at hand.
Cloning
Harvest day for our
main lady is a busy time. As such, a chunk is cut from inside her
stem near the base. The chunk is rinsed in 3%
H2O2, and placed in a small jar containing
sterile distilled water and peroxide (roughly .0015%
H2O2). A filter disc in the lid of the jar
allows the gasses produced by the peroxide to be vented. The jar is
left at room temperature until the initial harvest, drying and bio
assaying are completed. A period of roughly 2 weeks passes.
Peroxidated MEA is prepared in the standard manner. Peroxide
concentration is on the higher end of the recommended levels. The
chunk is removed from the jar and placed on the agar. The plate is
mostly colonized in a week and a half with temps hovering near 70
deg F.
Spawn
A quart of birdseed spawn is
selected from several prepared in the following manner. Birdseed
rinsed clean several times in cold water (which btw removes a lot of
sunflower seeds if you aren’t careful, or want it to, sunflower
seeds float and are easily poured off from the rest of the BS). Boil
an excess of water first. Reduce heat once boiling. Seed is simmered
on low for 30 minutes (no more since we will be adding peroxide
later and don’t want too much moisture). The grain is strained,
rinsed and dried thoroughly before being loaded into the quart jar,
½ full. The lid has a filter disc in it, but polyfill, or even
coffee filters or cardboard can be substituted since we will be
adding peroxide later. The jar is pressure cooked to sterilize and
also destroy peroxide decomposing enzymes. When cool, the quart is
injected with 12 cc’s peroxide, shaken and inoculated in front of a
flow hood with a piece of the peroxidated agar. Colonization is
complete in a week with temps around 80 deg F. A huge filter patch
bag is prepared with birdseed as above. Peroxide amount is
proportional to that listed above. In the flow hood, the bag is
inoculated with the colonized quart jar and sealed with an impulse
sealer. The bag is colonized in 11 days at room temps.
Bulk Substrate Prep
A large trashcan is
loaded with straw and aged cow dung appearing to be about 75% straw
25% dung by volume. A pillowcase with extra dung is put on top of
mixture and weighted with a cinder block. The thermostat on the
hot-water heater is turned up as high as it goes, 160 deg F. The
trashcan is placed in a bathtub and filled to the cinder block with
the now very hot tap water. Enough boiling water from a pot on the
stove is poured into the trashcan to bring the temp up to 175 deg F
according to a thermometer in the can. The lid is placed on the
trashcan and allowed to sit for 45 minutes, at which time the water
has cooled to only about 155 deg F. Big ass heat resistant gloves
are worn, and the trashcan is inverted carefully for draining, not
allowing any substrate to escape the can. The can is left inverted
to drain overnight.
Spawning bulk sub
The
cooled dung/straw is mixed with the bag of grain spawn and put into
the fruiting container. Fruiting container is a big cardboard box a
little bigger than 2’ square and about 8 inches deep, lined with
several layers of plastic bags. The extra dung from the pillowcase
is mixed with the remaining grain spawn and layered about ½ inch
deep on top. The dung top layer helps to protect the straw from
contams and moisture loss. Often large chunks of casing are removed
with fruits, exposing the substrate below. With straw becoming
exposed, this can be a bigger problem than if dung gets exposed.
Spawn Run
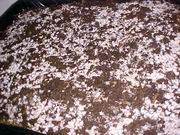
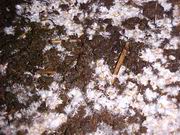
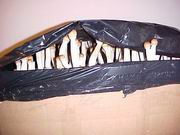
A perforated plastic sheet is laid
over the box for colonization, as shown below. The mixture colonizes
quickly due to the dung and the large amount of spawn.
Casing
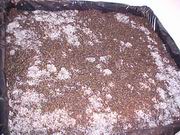
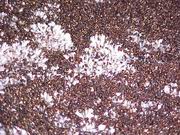
A casing of 25% verm and
75% coco coir (by volume) is prepared as follows. The verm is baked
in an over for 30 minutes at 200 ish. The coir is hydrated in a bowl
with boiling hot water. The two are mixed, a dash of lime is added
to bring the pH to about 7.8 and the mixture is hydrated to field
capacity. The casing mixture colonizes rapidly as is the norm with
coir, but retains moisture much better than coir alone. The same
perforated plastic from spawn run is used to cover the box during
casing run.
Fruiting
The plastic is removed
only once a day to expose the mycelium to light and to mist with tap
water. The plastic is left off for only a few minutes after misting
to allow the moisture to absorb. Pins show in a few days. Once pins
are noticed, care is taken to not disturb them with the plastic. It
is only loosely draped over the box.
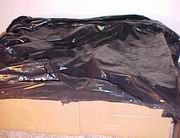
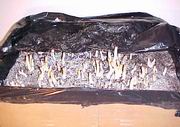
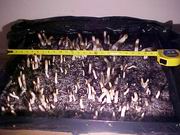
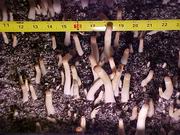
The daily (actually sometimes only every few
days) misting and lighting continues while fruits mature. A few
spots show a little tiny bit of overlay, and some casing is applied.
Pin set is acceptably even. Note that absolutely no attention was
paid to environmental parameters other than the sheet, the misting
and occasional light when the box was checked on. The box simply sat
on the dirty floor of a well-used closet, and enjoyed typical room
temperatures.
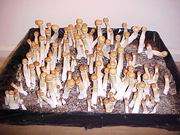
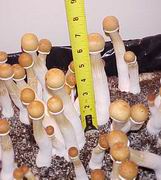
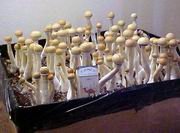
The caps seemed to be rather light for the
strain, likely attributable to the lack of light exposure. And of
course all fruits were harvested before committing the sin of over
maturation. (My humble opinion only of course). A tip is to water
the casing surface just before harvest. This helps to minimize the
chunks of casing that are pulled up with the fruits if the casing
has dried out.
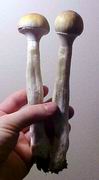
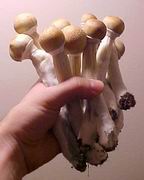
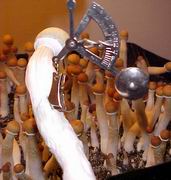
Nearly all fruits weighed in at roughly 30-50
grams wet, of course some heavier, some of the few aborts were
lighter. total yield for first flush was 8 oz dry. Very similar 2nd
and 3rd flushes followed, each with even less time being covered by
the plastic sheet. For each harvest, everything large enough to be
harvested without touching the casing was removed. Then a light
sprinkling of casing mixture was sprinkled over the surface and used
to fill the divits left from harvesting shrooms.
Repeat
Experiment
This experiment was repeated several months
later to prove it wasn't a fluke. This time, a different strain was
used and one of the boxes was only half filled.
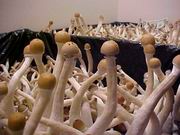
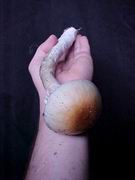
Some random second or third flush shrooms show
that dung/straw can make some downright humongus fruits, even if you
don't take special care of it.
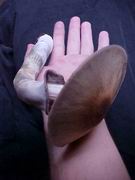
And this proves that I occasionaly missed the
perfect harvest time and accidentally let a fruit mature.
Mycofile
"From a certain point of view"
-Jedi Master
Obi Wan Kenobi
Comments on this article:
Posted by: 101184
2004-02-28
10:53:23
Best ever
wow
Posted by: Odiumjunkie
2004-03-09
09:43:50
This report is just incredible, what a god :-p